Offer ends in Offer $99 for 1 year 1daysd 12 46 08 One year for $99 Get your year
Tango Topics info:

Check out the Tango Dictionary for words like Axis and Connection.

Tag: sacadas

  • The Lead Step Over Back Sacada

    The Lead Step Over Back Sacada

    In Tango, we have multiple types of Sacadas, from multiple types of positions, with varying levels of complexities. Typically, the most difficult Sacada to execute for BOTH roles is the Back Sacada. The reason for that is because the Back Sacada usually requires a level of disassociation and applied disassociation that is difficult to accomplish. Most especially if either role has not done the necessary ‘ground’ work to make that happen.

    However, there are a series of Back Sacadas that DO NOT require that aspect at all! They’re typically not done for one reason or another, with the most common one being that they tend to break the embrace or the structure of the couple. Because no matter what happens, the back sacada must at some point face against the partner. And the set up for that is problematic, which is where the disassociation comes in.

    In this type of Sacada, none of that is necessary. When you stop and you think about it, this type of Sacada is one of the easiest Back Sacadas to execute for a Lead or a Follower. However, in this video, we’re going to look at the Lead’s version of this idea ONLY. And in a later video, we’ll take up the Follower’s version of this idea, which is slightly different in terms of how it would be set up and led. It should be noted that the basic structure of either side of this type of sacada is nearly identical across both roles!

    What is a Step Over Back Sacada ?

    This is a type of Sacada where one party steps over the leg they’re going to eventually sacada, forwards or back. Typically, it’s done from a Back Step. However, the sacada can also be done from a Forward step for either role. In this instance, we will not be looking at the Forward Step, but just the limited vantage point of the Back Sacada.

    The Follower’s Side of the Equation.

    For the Follower, there are 3 areas that we need to pay attention to:

    1.) The Collapsing Embrace.
    2.) The ‘Free’ Leg Component.
    3.) Coming To Collection.

    Let’s get some issues out of the way before we dive into the details. First and foremost, for you, this is the Lead Sacada-ing you. You don’t need to concern yourself with anything other than keeping your leg in the position it was left in. The reason why this is important is because most Followers are trained to collect their feet after a movement. In this instance, the Lead is literally stopping you from doing precisely that. You see, if you collect your feet, then there’s nothing for the Lead to Sacada! So don’t collect, yet.

    Secondly, quite honestly, this is one of those weird moments in your Following experience that’s going to be a bit out of the norm. It doesn’t happen all that often, if ever. However, now that I’m pointing it out and showing just how dead simple this is, be prepared for an onslaught of Step Over Back Sacadas. I am sorry about that. While I will address this later in the Lead’s section of this article, ideally, what should happen is that the Lead should ONLY do this no more than 3 times in a Song. And even that’s a stretch. 
    Lastly, this is one of those moves where you, as the Follower, are waiting for his majesty to do his thing to be flashy and ‘cool’. You basically just have to hang out until he steps backwards into you. When that happens, we ideally want your controlled displacement to occur (see collection below).

    The Follower Details.

    Collapsing Embrace.This means that your left hand is on his shoulder (more than likely), and your arm has collapsed inward towards you (as shown in the video). Ideally, what we want to have happen is that you want your arm to go AROUND your Lead as they lead you in back step around them.

    Free Leg. This refers to a very common issue that crops up, that we as followers want to just let the leg fly freely backwards out of collection. While this is desirable in certain situations. This is NOT one of those times. Ideally, you want to keep your motions separate from each other and really listen to what’s being asked of you. There’s another reason why you want to contain or curtail your ‘free’ leg. Because it’s all too easy for you to let that leg fly and then hit someone behind you! So … try NOT to do this!

    Caveat > Most Leads are NOT this clear where they are deliberately leading X to get Y response out of you. So as a result, they’ll muddle through. However, the resistance-based Lead will use their arms and physical pressure to generate those clear individual motions. This is NOT desirable. Ideally, we want our Lead to use intention to generate, ask for, and follow through on any motion that we’re being led to do. 

    Collect Your Feet. This should be a no-brainer, but sometimes we need the reminder. Remember to collect your feet/bring your feet together in the appropriate places! One appropriate place is when you are being sacada-ed, and the Lead has stepped back into your leg; your leg wants to fly free, but it can’t, and this is where you must remember to invoke a controlled displacement of the leg and bring your feet to collection. As they continue their rotation, it will lead you stepping backwards and ending up back in front of your Lead. 

    The Role of the Active Follower.

    In the role of the active follower, there is something here that can affect what the lead does NEXT and how they do it. By changing the angle of your rotations either towards or away, you affect how close the sacada will be and, more importantly, what is done next. You can actually prevent them entirely by stepping slightly away or by coming to collection everywhere deliberately! Remember, if there’s no leg there, there’s nothing to sacada! Why do this ? By NOT participating here, it prevents the possibility of opening the embrace and further forces the lead to keep things on the simple and clear. 

    The Lead’s Side of the Equation.

    This is really simple for you, just a reminder but:


    Final Thoughts.

    This is a fun little sacada that can be used in any number of places to either taTangor vaVals MusicHowever, it’s best in taTangousic. Usually late Pugliese, Calo, or D’Agostino. Any music where there are lolongtringy notes. You want to use the loLongstStringyote as the ststep overart!
  • Crossing Sacada Turn

    Crossing Sacada Turn

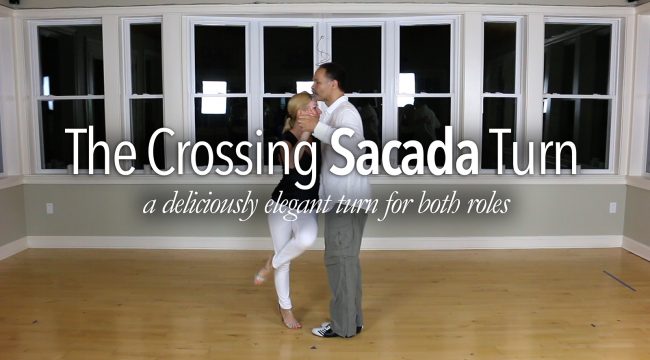
    What is a Crossing Sacada Turn ? In its simplest form, it’s nothing more than a series of Simple Sacadas that are chained together that just so happen to utilize the Follower’s Molinete or ‘Turn’, which employs the Argentine Cross as it’s basis for entry. While the turn can be done without this entry point, it loses it’s ‘elegance’ by without using the Argentine Cross.

    To be clear, a ‘Sacada’ is one of 4 types of Tango Displacements (Boleos, Gancho, Wrap/Enganche, and Sacadas), meaning that either the dancer’s leg will displace or their entire body will be displaced or take the place of their partner. A Sacada can be done from open or close embrace, it can be done by either role to the other, and has lots and lots and lots of options (about 501, at last count – not kidding).

    A turn, as defined by Tango Topics, can be but is not limited to these ideas in order of precedence: 1.) The Follower’s Molinete to the Lead’s Giro (the Common ‘Turn’). 2.) A Milonguero Turn. 3.) The Ocho Cortado. 4.) The Argentine Rock Step/Turn. 5.) The Calecita. 6.) A Walking Turn.  7.) The Media Luna. and 8.) A Single Axis Turn.

    A ‘Crossing’ Sacada Turn ? Is exactly what it sounds like, a turn that has a bunch of Sacadas as part of it. In this particular case, this Sacada Turn uses the Follower’s Molinete, and a very important structure that Tango Topics completely eschews repeatedly, and says that you should never, ever do. This is the ONE time when you do want to do that, however with all things, there’s always a caveat to the caveat. That said, let’s talk about The Crossing Sacada Turn.

    The Free Tip. Something to keep in the back of your mind is that while this is a cool piece of vocabulary and you’ll see it executed a lot, there is another version of this that does NOT include the last Sacada. Truthfully we can execute the Sacada Turn without the 3rd Sacada, and everything works just fine, sort of. Doing so, can generate other options and opportunities for us as Leads and Followers. However, one thing that will continually plague you is why the Follower continually turns away from the Lead after the 2nd or 3rd Sacada! There’s a reason for that, and there’s also a solution for it which is why it is important that you watch the video in it’s entirety to see exactly what is generating proper execution of the Sacada Turn! And don’t just rely on your eyes to assume what’s happening here.

    About The Video. This video comes in at 34m:02s in length in 13 Sections. This video contains no Follower and/or and very little Lead Technique.

    Section 1 – Introduction – 00:00:52
    Section 2 – Argentine Cross – The Starting Point – 00:01:32
    Section 3 – The Lead’s Cross Behind – 00:02:35
    Section 4 – The First Sacada – 00:01:09
    Section 5 – The Follower’s Flailing Foot Error – 00:02:17
    Section 6 – The Second Sacada – 00:01:32
    Section 7 – The Third Sacada – 00:03:10
    Section 8 – The First Complete Sacada Turn – 00:01:32
    Section 9 – The Turning Brake – 00:04:08 (technique)
    Section 10 – Removing The 3rd Sacada – 00:00:58
    Section 11 – A Variation On A Theme – 00:03:47
    Section 12 – The Close Embrace Version – 00:01:34

    Section 13 – With A Metronome/Closure – 00:02:34

  • Close Embrace Sacadas

    Close Embrace Sacadas

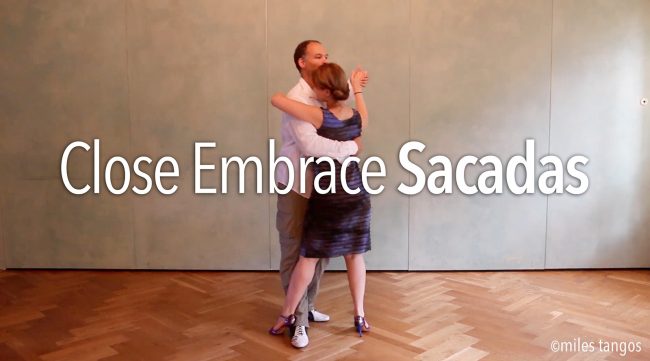
    When we’re first starting out with Tango, both roles see the idea of a sacada as cool, flashy, or impressive. And they are until you realize one simple, but immutable, fact: They’re illusions…of walking technique. The Sacada happens due to an intersection of the Follower’s walk into the Lead’s or vice versa. At the same time, the Sacada is usually relegated to something that is done in open embrace and/or thought of as ’nuevo tango’ vocabulary. You can thank Gustavo Naivera, Fabian Salas, and later on “Chicho” for that one. The Sacada was around long before those three came onto the scene. It just so happens that they made it very popular. One aspect of the Sacada is while they are typically done in open embrace because of the space needed for them and certain variations of them. There is a version of them that is purely for Close Embrace, hence today’s topic: The Close Embrace Sacada!

    What is a Close Embrace Sacada ? It is exactly what it sounds like. It’s a Sacada that’s done from Close Embrace. It’s a controlled displacement where either the Lead or the Follower’s leg will be displaced in a very controlled and refined way. Typically the Close Embrace Sacada is done from the Lead onto the Follower, typically.

    From a Dancing Perspective, the Close Embrace Sacada looks intimate, intricate, and above all else, very hot. No doubt about it. Done right, it screams “WOW”. Done poorly, and well…not so much with that. And that’s exactly what happens most of the time. The intent is there but the execution is poor. So we end up missing the whole effect. Either the intersecting step (lead or follow) was too shallow, too deep, or missed entirely. All of which happen quite frequently. It is only with time and patience, and a lot of practice that we ‘learn’ through trial and error (more error than trial) to execute with precision the a Close Embrace Sacada. To be clear, this variant of Sacadas require precision control, precise intent, and precision execution. To alleviate this problem of precision, you’ll see a lot of Leads (and some Followers) quite honestly watch the feet of themselves and their partners (I make this mistake myself from time to time especially on over-rotated back sacadas). This is a major no-no! It breaks the illusion! This is where we talk about one of my favorite topics that almost no teacher talks about – Proprioception from a Tango Perspective. What’s that ? It’s the ability to sense where your partner is in space and time WITHOUT looking! This is not something that you just learn and it happens. There is no class on this stuff. It is a skill that you build through time, with time, with lots and lots and lots of trial and error. Unfortunately that ‘error’ results in someone’s feet getting bruised sometimes. Trust me, you learn pretty damned quickly after that! Add in Close Embrace Sacadas and this skill is an absolutely necessity! Failure to build this skill and the Close Embrace Sacada is going to be the Close Embrace Bloody and Bruised Toe Extravaganza of Your Worst Nightmares! So how do we develop this skill ? Simple. Stop watching your partner’s feet. That’s the starting point.

    Free Tip: The closer you are, and the tighter the arc of your step around your partner (forward, side, or back), the tighter the resulting Sacada becomes!

    Pre-Requisites: 1.) You must have mastered your walk first and foremost to the point where you are not using your partner (either lead or follow) for stabilization. 2.) You must be familiar with the principles of the Sacada itself. 

    About The Video. This video is 21:45 in length in 9 Sections. Both Lead and Follow technique is co-combined. 

    Overview – 00:58
    Lead Technique Review – 01:05
    Follower Technique Review – 00:48
    Sacadas For Close Embrace Technique – 05:01
    Follower’s Close Embrace Sacada – 03:41
    Follower Forward Step to Lead’s Forward Step – 01:08
    The Other Follower’s Forward Step – 02:05
    Footwork Details – 04:48
    Examples and Review – 01:38

Hide picture